Here are some standard EthOS features and important reminders for your user experience.
EthOS Dashboard
When you log into EthOS, you arrive at a main dashboard. As a dynamic system, the EthOS dashboard continually adjusts based on your application scenario and status. The basic structure of the EthOS dashboard involves four main areas:
- Navigation Menu Bar
- Action Pane
- Work Area
- Projects Area
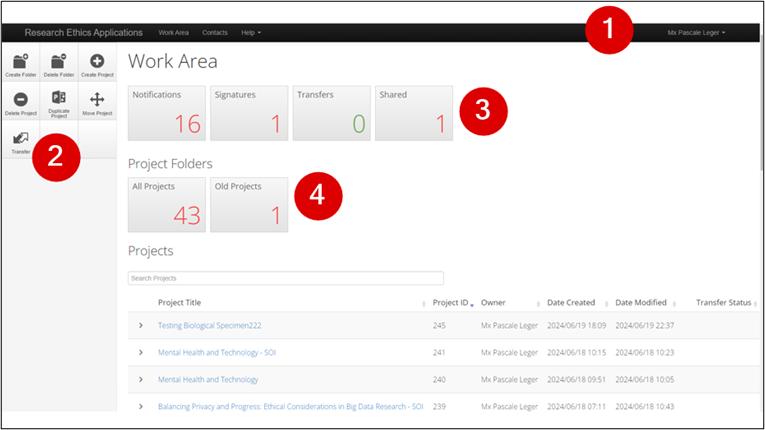
1. Navigation Menu Bar
The navigation menu bar appears on every page. Use it to quickly jump back to your Work Area, Contacts, Help, and User Settings (top right).
Note: there is no integration between EthOS and your Outlook contacts, and the Contacts feature does not trigger autofill in any subsequent fields. Contacts can be entered manually for the convenience of having these details on hand within EthOS.
2. Action Pane
Dynamic, contextual Action tiles are a key user experience feature with EthOS. Certain actions are available depending on where you are in the application form and process. Later sections of this Applicant User Guide explain available actions in more detail.
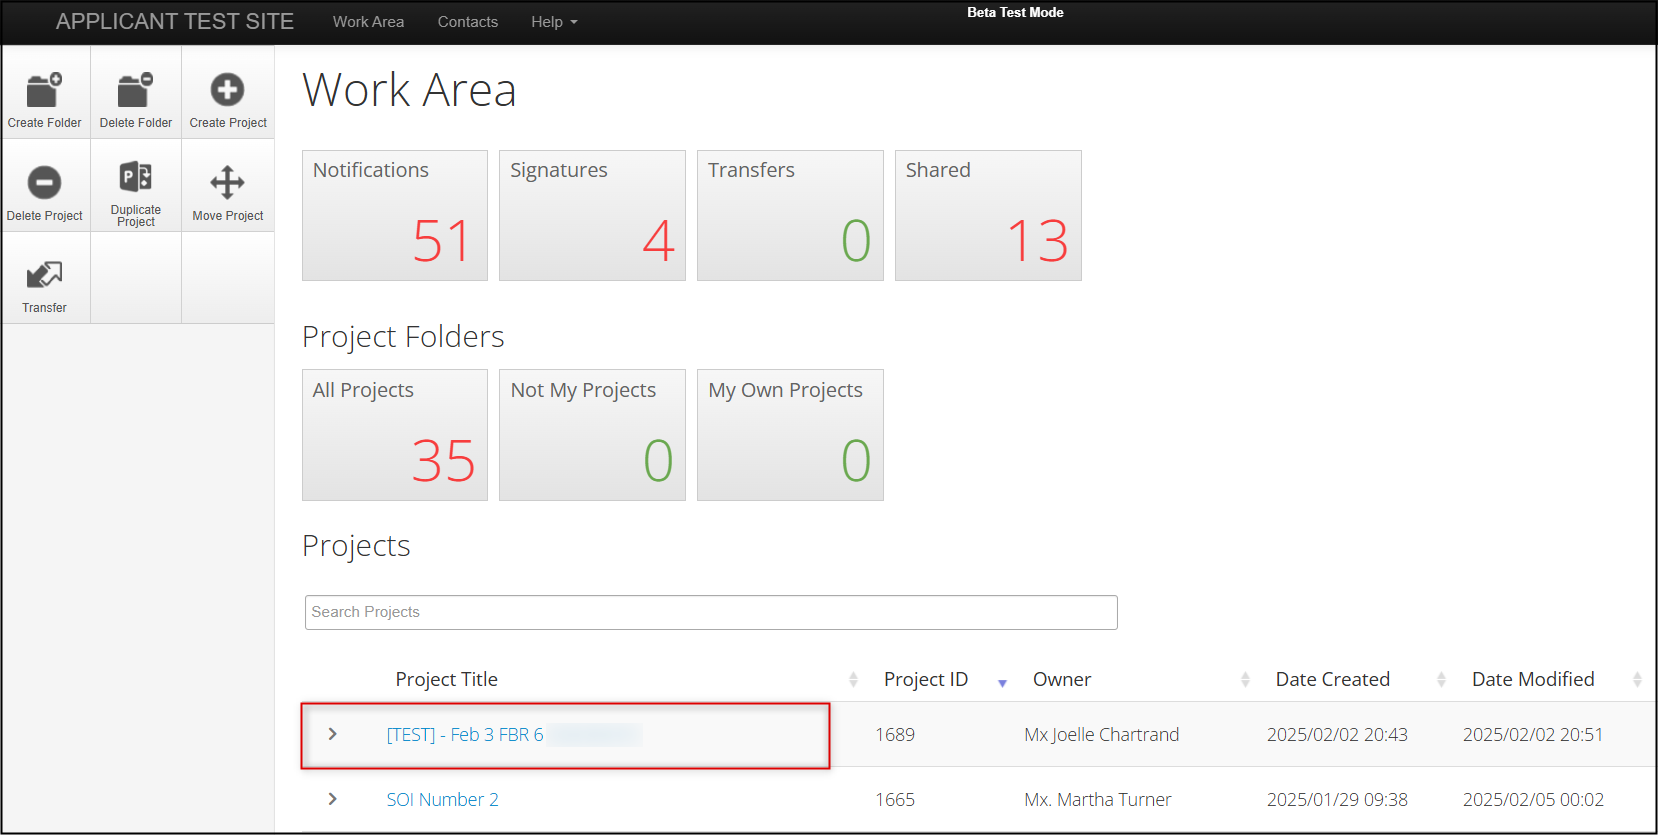
3. Work Area
Notice the boxes or tiles at the top. Tiles in the Work Area provide counts of activity specific to your projects and forms. Green zeroes mean that there are no applicable records for that tile. Once records are available for a tile, the number of records appears in red.
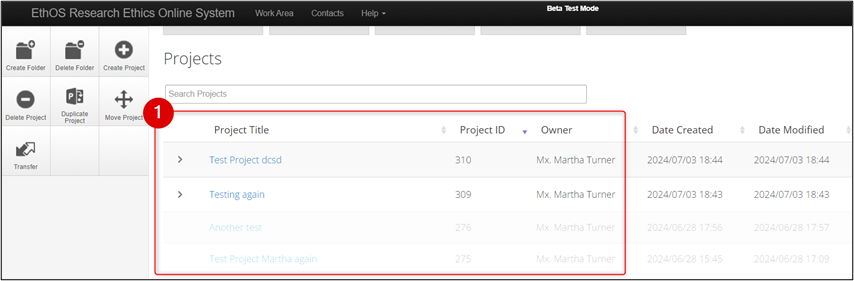
4. Projects
Initially, your Projects area will be empty. However, as you work with EthOS this area will display all projects that you have created or for which you are named as a collaborator. See Managing Your Projects for more information.
Moving Between EthOS Screens
As you move through EthOS, return home to the Work Area by clicking on the EthOS title or the Work Area menu option. During an REB application, you can move through form pages using the Previous, Next, and Navigate Action tiles.
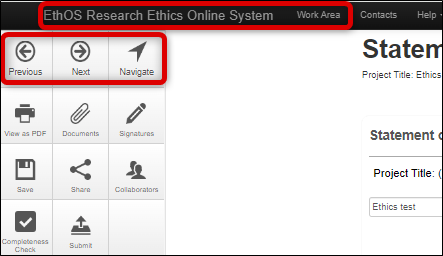
Important: Using your browser back arrow will result in a loss of any unsaved data on a screen. If you must use the back arrow, make sure you click the Save tile first.
Work Area Tiles
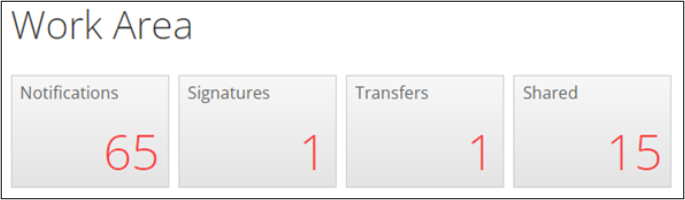
The Work Area has four main tiles which dynamically adjust and show various counts of information relevant to your projects and submission scenarios.
Notifications
The Notifications tile contains the automated messages generated throughout a project's lifecycle. (You can also access notifications from your Username in the top right of the Navigation Menu Bar). The red number is the total number of notifications. Click the Notifications tile to display the Notification Centre.
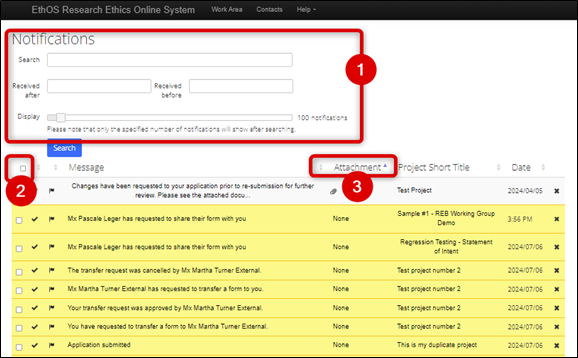
In the Notifications area you can:
- Enter search terms to find specific notifications
- Click on the top-level check box to bulk delete notifications or mark all as read
-
Sort columns and find notifications that include attachments (e.g. a summary of modifications requested or an approval letter)
-
Click on the Paperclip, then click Download to see attachments
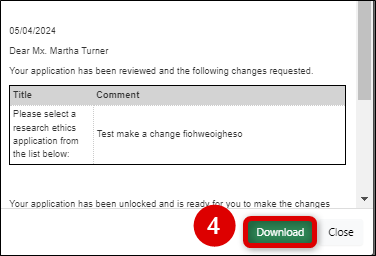
-
Alternatively, click on the title of the notification, then click View Form to access that specific form

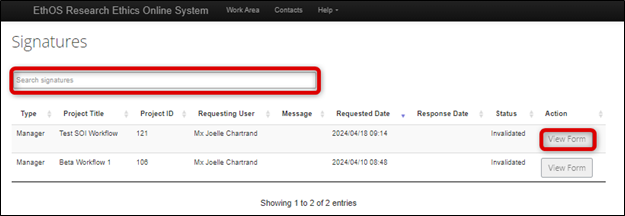
Signatures
The Signatures tile displays the number of signature requests awaiting your action or given. You can search on signatures, and use the View Form button to access, review, and sign applications from the Signature tile. See Signatures and Submitting Applications for more information.
Transfers
The Transfers tile contains information about projects that have been transferred to you, or that you are in the process of transferring to someone else. A transfer is only used when the ownership of the project needs to be reassigned and is not the same as sharing a form. Once a form has been transferred to the new owner, the tile number reduces by one. Past transfers are also accessible from this tile. See Transfer Ownership of a Project for more information.
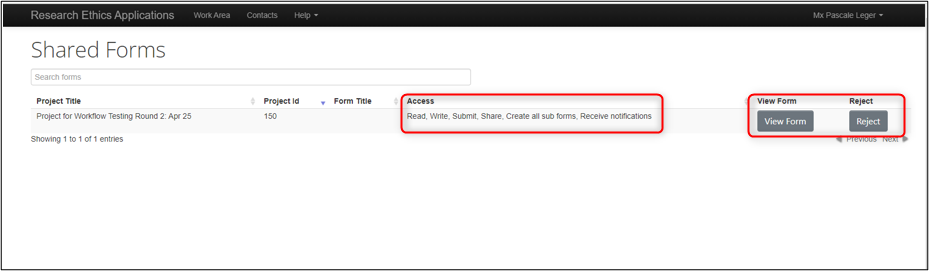
Shared
The Shared tile displays the number of forms that have been shared with you. You can see the type of access the owner has provided and access the shared form directly from here. You can also reject the request to share the form if necessary. See Adding Study Personnel and Sharing Forms for more information.
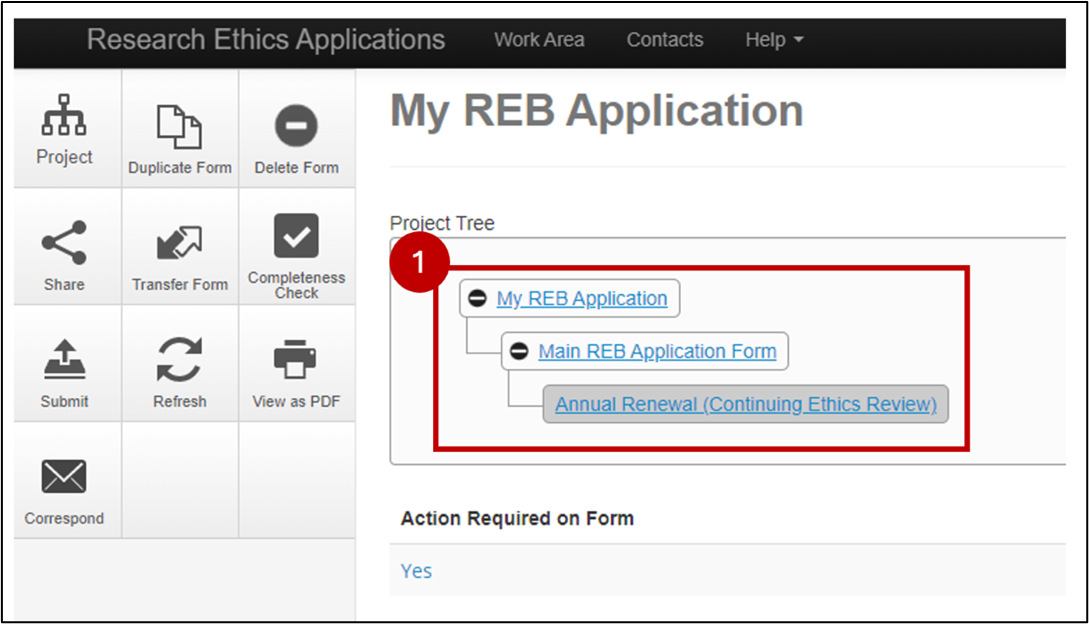
Project Tree
EthOS is based on forms. Every project will likely have several forms – e.g., the main application form and any subforms such as amendments or event reports. When you create a new project, EthOS displays each project as a tree, with the project title as the ‘parent’ and hierarchical branches between the main application form and subforms. As more subforms are added, the tree expands. Navigating within the project tree is a quick way to find and access all forms within your project.
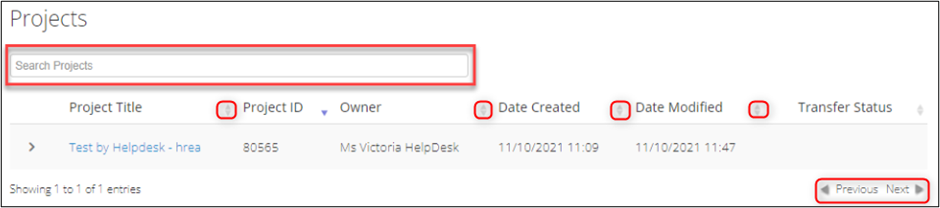
Project List Searching
The Projects area displays the list of your projects (including those that have been shared with you). In the Search Projects bar, you can search by Project ID or full text to locate a project in the list.
- Note: The full text search does not search the contents of the application itself. However, see View as PDF as a workaround solution if you need to run a full-text search of an application.
You can reorder the contents of each column using the sort arrows beside each column title. You cannot rearrange the order of the columns themselves in the Project list.
If your project list has many entries, scroll down and use Previous or Next to navigate between pages.
Finding and Understanding Your Application's Status
There are two options to easily find the status of your REB application. The status information updates every ten minutes.
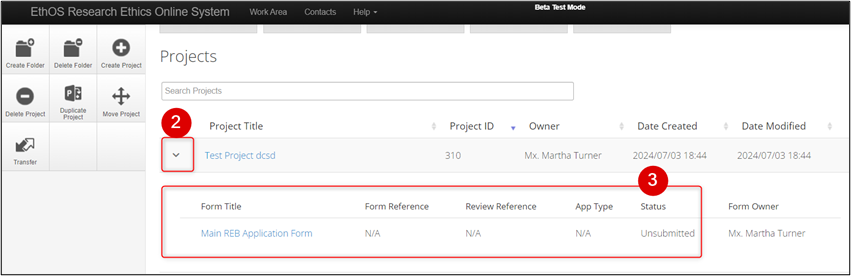
From the Project list
- Browse the Project Title in the Work Area
- Click on the expand arrow beside the Project title to display its related forms
- Review the additional details about the form, including its status
The First Page of the Application Form
You can also see the status of an application each time you open the form.
-
Click once on the Project Tile to open it from the Work Area Projects list
-
Review the application’s status and other details below the Project Tree
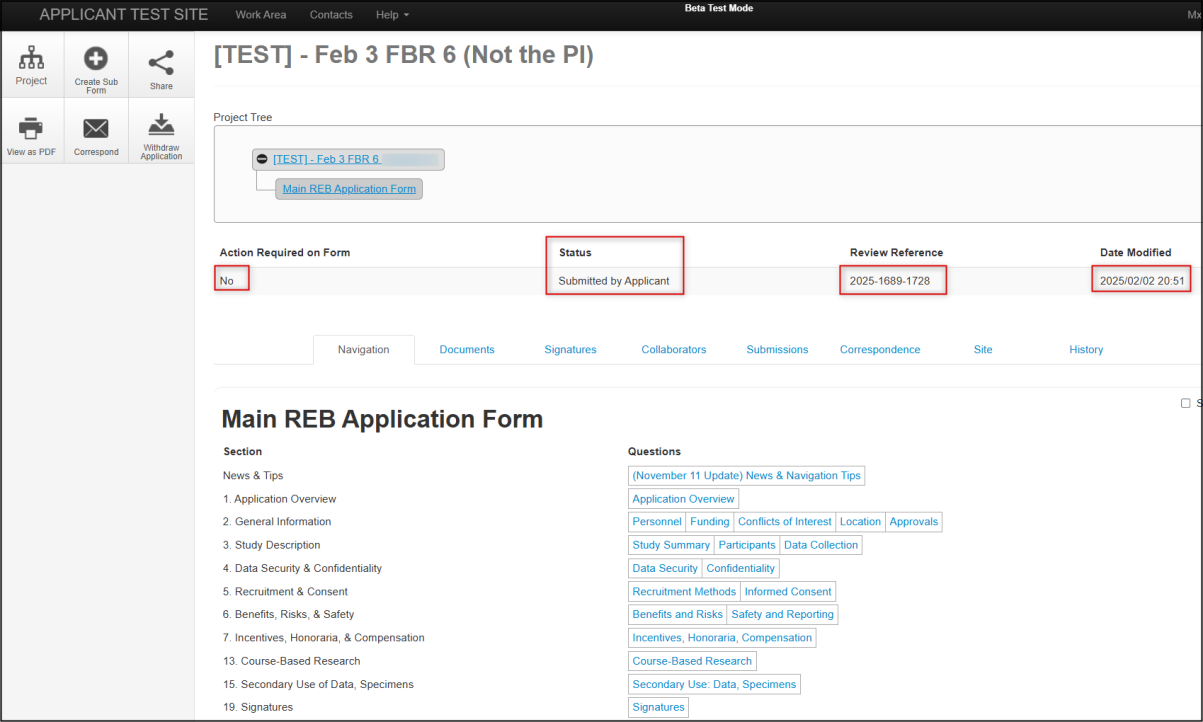
Status Definitions
Depending on your application scenario and where you may be in the approval process, different status messages will be displayed.
| Status | Definition |
|---|---|
| Not Submitted | The form has not yet been submitted to Research Ethics |
| Submitted by Applicant | Application was submitted successfully |
| Administrative Pre-Review | Research Ethics is completing the administrative review for completeness etc. prior to assigning for Research Ethics Board (REB) review |
| Modifications Requested (Pre-Review) | Application has been returned to research team (prior to REB review) for modification |
| Modifications Received (Pre-Review) | Pre-review modifications completed and application returned to Research Ethics |
| Ready for REB Review | Pre-review complete, application is ready to be assigned for REB review |
| Under Delegated Review | Application has been assigned for delegated review (minimal risk protocols) |
| Under Full Board Review | Application has been assigned for review by the full REB (greater than minimal risk protocols) |
| Modifications Request | Application has been returned to research team (post REB review) for modification |
| Approved | Application has been approved and certificate issued |
| Rejected | Application is rejected (rarely used) |
| Superseded | Replaced by a newer version of the form |
| SOI Review | Statement of Intent is under review |
| SOI Rejected | Statement of Intent is rejected (rarely used) |
| SOI Approved | Statement of Intent is approved |
| Modifications Request SOI | Statement of Intent (SOI) has been returned to research team for modification |
| Modifications Received SOI | SOI has been modified and returned to Research Ethics |
Form Update Messages
If new functionality or features have been added to a form by system administrators, the next time you open the form you will be prompted for an update. (Researchers should expect that form updates may happen more frequently in the early phase after U of G launches EthOS). Updating is an important step that must be completed to ensure that your project is always working with the latest form.
Researchers can see the running history and details of the form updates on the EthOS Alerts and Form Update page.
Who Can Apply the Form Update?
The Project Owner must be the one to accept the update prior to any further work on the form. If a form update message is displayed, and you are not the Project Owner, contact them and ask that they complete the update. The Project Owner is the applicant who initially created the project (form).
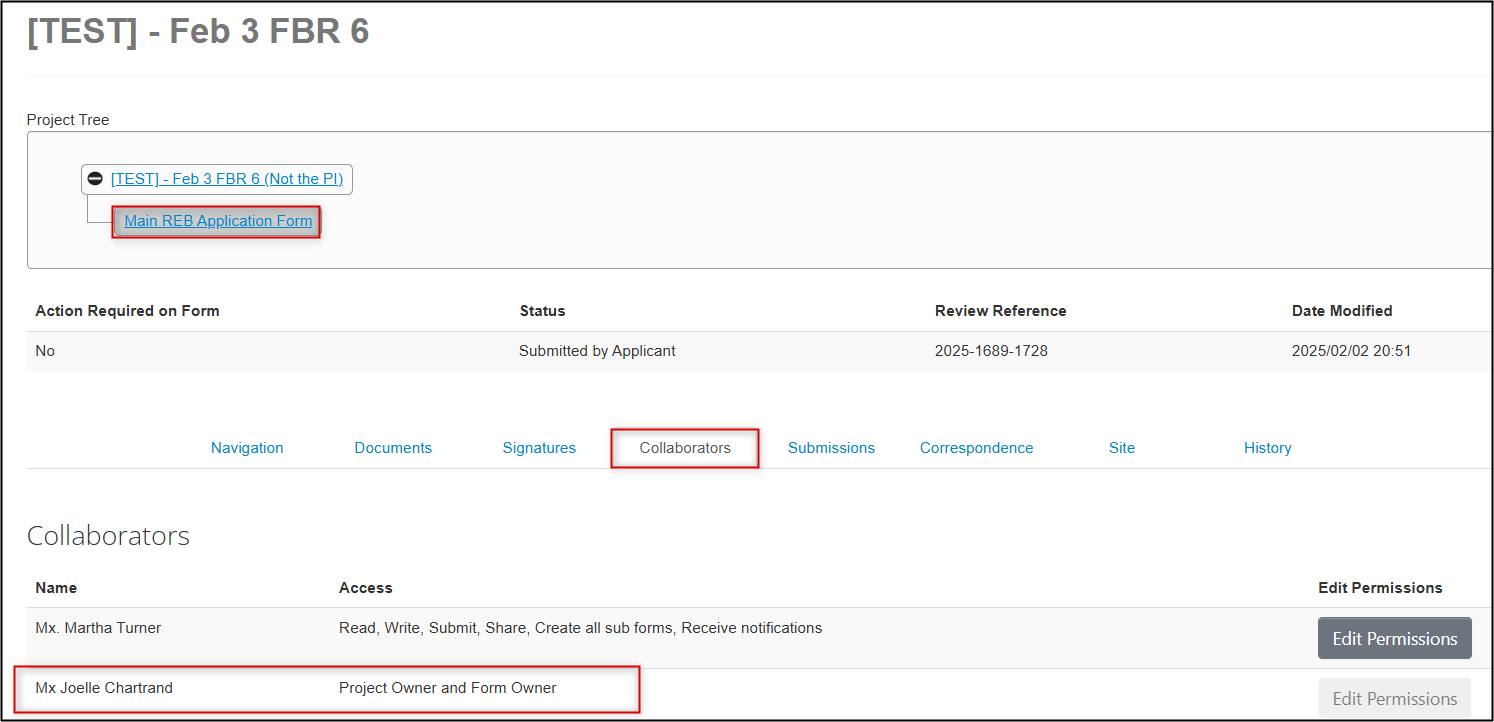
How to look up the Form Owner:
- Locate the form in your EthOS Project List
- Open/access the form
- Click on the Collaborators tab of the form
-
Look for the name of the person who is the Project and Form Owner (the person who created the application); contact them and ask them to apply the update
Applying the Form Update
-
The form update message will appear at the top of the updated form; it may be red (mandatory), or yellow (optional):


- Red (mandatory) messages will prevent you from proceeding unless the form is updated. This is used when the change is part of a critical fix or improvement.
- Yellow (optional) messages won’t prevent you from proceeding. However, we strongly suggest that you update the form as soon as possible. Eventually, an optional update will become a mandatory one.
-
Remember: only the Project Owner can update the form
- If you aren’t sure if you are the form owner then click on the blue Update link – if it updates then you are the form owner!
- Otherwise, or if you don’t see the blue Update link, then contact the form owner and ask them to apply the update (see above for how to look up the form owner)
- If the form owner is no longer with the U of G, contact RAIMSSupport@uoguelph.ca for help transferring the project to you or another new project owner.
-
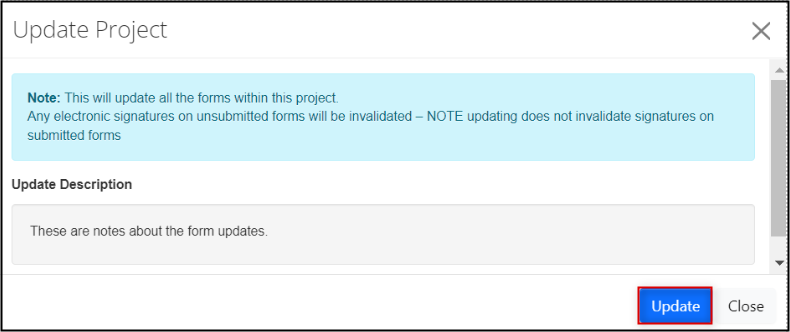
In the Form Update message, click on the Update link; in the pop-up window you can review any form update note messages and then click on the Update button
-
Note: if you were recently working on an application and had requested a signature, and this signature request was still pending, you may need to request the signature again after the form has been updated. Signed, submitted forms do not need to be signed again.
-
Important Reminders!
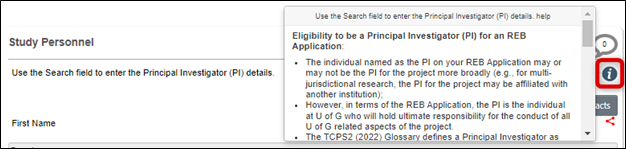
Use the Built-in Guidance
 indicates that more information is available for that question or section. Click on the icon to access the additional guidance, which in some cases may hyperlink you to other resources.
EthOS Timeout is 30 Minutes
EthOS will automatically log out applicants after 30 minutes of inactivity. You will receive a one-minute warning notice to prompt you to stay logged in if needed.
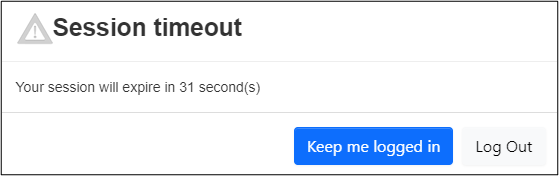
If you have stepped away and return after EthOS has timed out, you will see this message:

Follow the hyperlink in the Session Timeout notification window to log back into EthOS.
Don't Forget to Save!
EthOS does not ‘autosave’ in the same way that other cloud-based applications do. Your progress only automatically saves in the following instances:
- When you navigate from one page to the next using EthOS actions (not browser buttons)
- When you run a completeness check or upload a document
We highly recommend manually saving frequently in case of interruption.
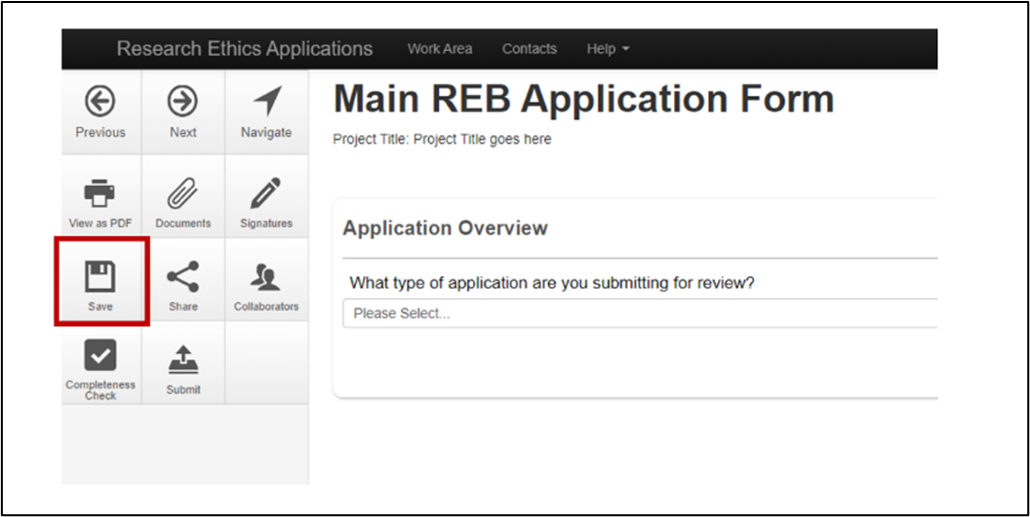
- Click on the Save tile in your actions pane.
Note: When you manually save your data, EthOS displays a green Save Complete message in the menu bar.

EthOS will not automatically save when:
- You use your browser back arrow to return to a previous screen
- There have been no changes since your previous autosave or manual save
- Example: If you move to the next screen (which triggers an autosave) and then manually click the Save tile before making any data updates, you will not see a Save Complete message (nor will EthOS autosave) because nothing has changed between the two save transactions