Every REB Application starts with creating a project in EthOS. Projects can have different forms. As your research study progresses, you may also need to add subforms to your project, which are also available in EthOS (see Renewals, Closures, Event Reports for more information).
Note: Please ensure you have read the Getting Started and Basic Navigation materials before creating your first application.
Completion Guidance Before You Begin
To submit an application, users navigate through the EthOS dynamic form, answering all the question prompts in each required field. As you complete the form, please keep in mind the following:
- Regularly check the Welcome to EthOS section for news and tips, including our 'always open' EthOS suggestion box (for U of G/UofGH researchers) - we appreciate your feedback!
- The questions asked are drawn from the Tri-Council Policy Statement: Ethical Conduct of Research Involving Humans, 2nd Edition
- U of G and UofGH students must submit an appropriate CORE training certificate and training is highly recommended for the entire research team
-
Leverage the information buttons (where you see an
 ) as you navigate the form; Research Ethics has added specific and helpful guidance for applicants
- Read the instructions carefully for each question on the application, ensuring that answers are specific and relevant to the questions
- All fields are required unless indicated by [Optional] at the start of a question or prompt
- Tip: Each section has been designed to request specific information, so there will be no need to repeat the same information or upload the same document in multiple places
Creating a Project
To submit a Main REB Application Form, start by creating a project.
Note: If you are creating a Statement of Intent, see the Statement of Intent instructions.
- From your EthOS Work Area, click on the Create Project button
- Type in a project title
- Note: at this stage, the title is capped at 200 characters because this is the title displayed in your Project List and system notifications; you will have an opportunity to enter a longer title (if needed) shortly once you begin your application
- Select Main REB Application Form
- Click on the Create button


Note: Creating a project can take some time, and you will see a moving circle graphic while the dynamic form is being created. Do not close your browser while the project is being created.
Once your project is created, EthOS creates a unique Project ID number in the Overview pane. This number is visible throughout the screens in the application form and in all email notifications. The Project ID number will now be used as the REB number.

From the Main Application Form landing page, you must first enter some additional details to generate your customized form, as outlined below.
Entering Initial Details for the Main REB Application
EthOS dynamically generates the appropriate form sections required for your project based on the initial details provided in the Application Overview pages. To begin this process:
- Review the content in the Welcome to EthOS section if you have not yet done so
-
Navigate to the Start Here section to enter details about the type of submission

- Note: refer to the built-in guidance for detailed descriptions of the three options of Standard REB Applications, Multi-jurisdictional Research, and REB Exemption
-
Click Next to advance

-
Answer the Amendment Summary question (see the Info Button if needed) and click on the Next button to advance

- On the Nature of the Project page, answer the series of questions; your answers drive a number of dependent questions and subsequent sections of the form – see the Info Button guidance where needed
- After you have entered all of the Nature of Project questions (ending with the anticipated project start date), now you can continue your form entry in one of two ways:
-
Use the Previous and Next buttons to continue answering questions as the form dynamically adapts based on your answers

-
Or, click on the Navigate button to see what form sections EthOS has enabled for your project; most users prefer this option, but you must still complete the sections in their sequential order (i.e., do not enter information in a later section of the form before its previous section)

Reminder: You can use the Navigate button at any point while you are completing your application. The Navigate button will always bring you back to the Main REB Application Form overview where you can jump to other tabs or forms sections, or return to your previous section.
Layout of the Main REB Application Form (After Entering Initial Details)
After all questions in the Application Overview section have been entered, EthOS will dynamically create the remaining form sections based on your research study scenario. From the Main REB Application Form landing page, you can easily navigate to different parts of the form as you complete your application (although you should still complete these sections in the order they appear).
Let’s review different areas of the Main REB Application Form landing page:

1. REB Application Form tabs
Each tab corresponds to certain areas or components of the form and will contain or trigger different functionality.
- Navigation shows the summary of all the form sections and pages that need to be completed, based on the type of study
- Documents houses and lists all supporting documents that are attached throughout the form (in response to an “upload document” prompt)
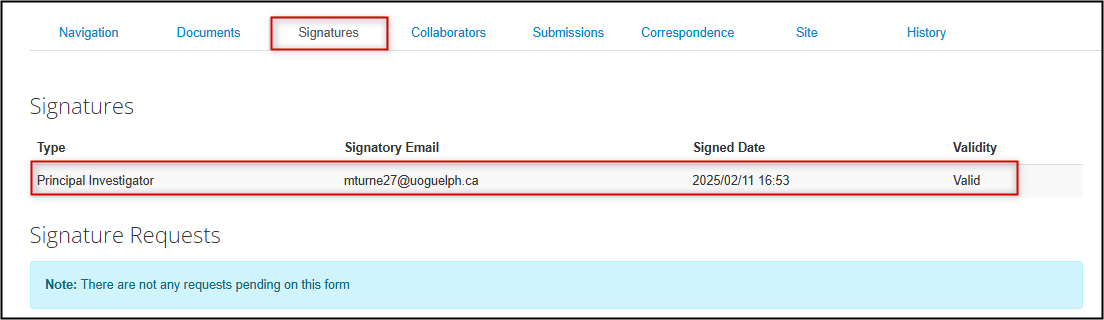
- Signatures shows a running history of signature details for the application (the tab will be blank initially), but is not where signatures are requested or completed; for more information see the Signatures and Submitting Applications section later in these instructions
- Collaborators lists anyone (including the person who created the application) who has been given access to the application and their specific permission levels; for more information, see the Adding Study Personnel section later in these instructions
- Submission summarizes submission status and details of the form
- Correspondence provides the ability to contact the Research Ethics Office, with all correspondence contained thereafter within the project file
- Site is the location of the approving REB (which will always say Guelph), and where you can find the expiry date of any approved applications
- History updates at each major step of the application submission process as the form moves through the workflow
The functionality of each of these tabs is further explained in the remainder of the instructions below.
2. Main Application Form Sections and Question Pages
No more guesswork! EthOS adjusts depending on your application scenario and ensures that you are completing all the required details for your study.
- The main form’s sections are displayed on the left and questions for that section are organized into pages on the right
- If a page text is blue, the questions on that page will be relevant for your application; click on the blue text to navigate to that page directly
- If a page text is black, the section is relevant for your application, but that specific page is not
3. Show Inactive Sections
- The default view shows only relevant sections
- However, to see all possible sections of the main REB application form (including ones that don’t apply to your study), click on the Show Inactive Sections checkbox
Adding Study Personnel
Important Process Overview Guidance
After completing the Application Overview questions, identify and add all study team members/collaborators and then complete a separate step to ensure that everyone has the correct access (if needed) to the application.
The Personnel page is broken into four main panels (areas):
- Identifying the Prinicipal Investigator
- Listing U of G/UofGH study team members/collaborators*
- Listing study team members/collaborators not affiliated with the U of G/UofGH*
- Permission confirmation (assigning access roles)
*Including yourself if you are not the PI creating the application
First Panel: Adding the PI
The PI’s contact details must be entered using the Search User lookup fields which means that the PI (if this is not you) must have activated their account first.
If you do not see the PI as a search result, ask them to log into EthOS. Return to the Personnel page once you know that the account is activated.
Second & Third Panels: Adding Other Study Team Members/Collaborators
These panels will ask you to list study team members/collaborators based on whether they are directly or peripherally involved in the study.
A direct role in the study would include any/all of the following:
- Interactions with participants
- Access to identifiable data
Directly involved study team members/collaborators must be listed using the Search User lookup fields, which means that all these individuals should have activated their accounts first.
If you do not see an expected search result, ask them to log into EthOS (or request an external account) and return to the Personnel page once you know that all accounts are activated.
A peripheral role in the study would mean that:
- Researchers would have access only to de-identified, anonymous or anonymized data
- Researchers would not be involved in any interactions with study participants
Peripherally involved study team members/collaborators can be listed as ‘free text’ where prompted, and do not need to have active EthOS accounts.
Fourth Panel: Assigning Access (Roles)
Listing study team members/collaborators on this page does not automatically grant them access to the application form. A separate step is required to assign an EthOS role for any study team member/collaborator who also needs to access the application.
A role is a pre-configured set of permissions to ensure that the correct access is applied and all relevant system notifications are received. For more information on available EthOS roles, consult the Sharing Forms (Assigning Roles) materials.
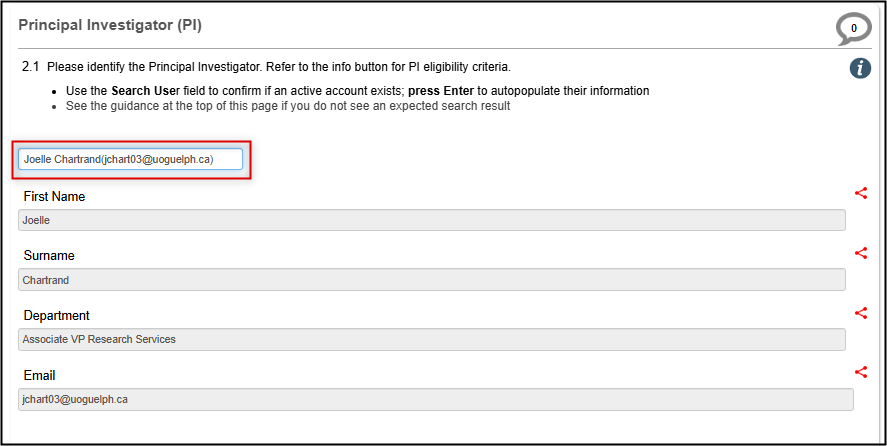
Naming the Principal Investigator
The first study team member you will name is the PI. (Even if you are the PI – and will have answered this question in the previous section - you still need to enter your contact details; however, you do not need to assign yourself the PI role).
At the top of the Personnel section in Question 2.1:
-
Type in the name of the PI in the Search User field; press Enter or Tab to confirm your selection and auto-populate the contact details
-
Refer to the Important Process Overview Guidance section above if you do not see an expected search result
-
- Upload the PI's TCPS CORE certificate (optional but highly recommended)
- Enter an emergency name and telephone number (usually the PI)
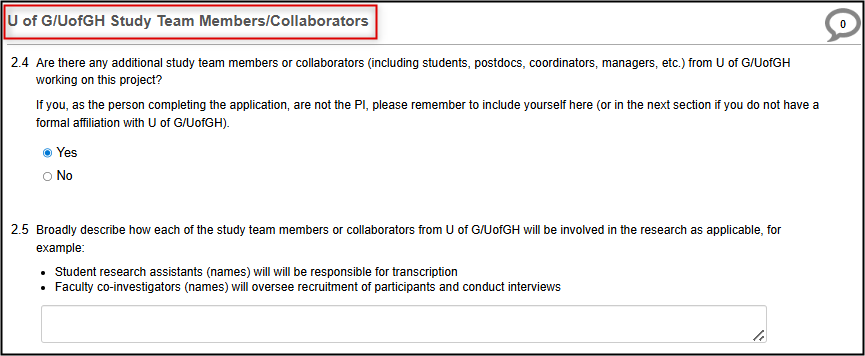
Adding U of G/UofGH Study Team Members/Collaborators
Now you will be prompted to add other U of G/UofGH study team members/collaborators, based on whether they are directly or peripherally involved in the study.
Reminder: If you are not the PI, and are affiliated with U of G/UofGH, you must also add yourself as an ‘additional’ study team member in this step.
-
In the U of G/UofGH Study Team Members/Collaborators panel, answer Yes (if applicable) and briefly describe their roles
-
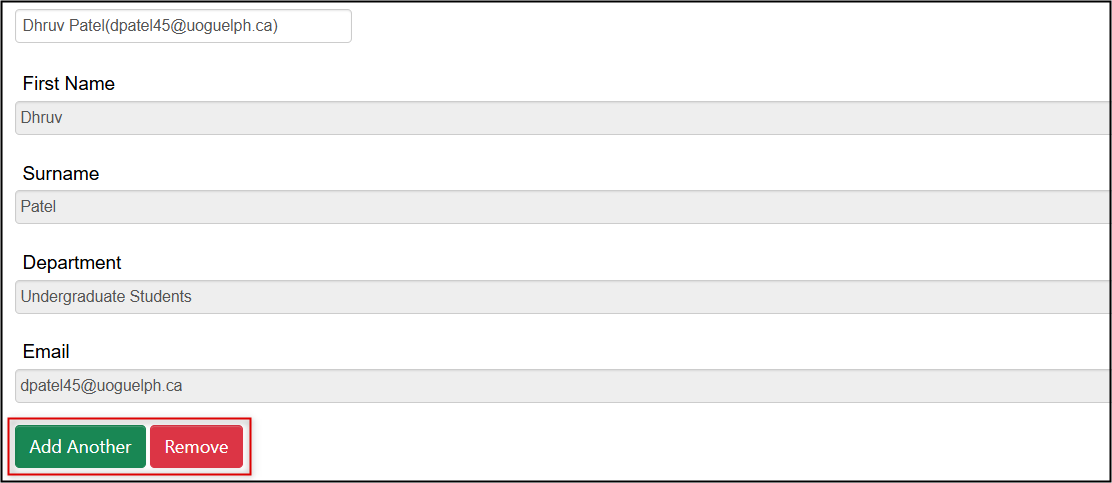
For anyone who is directly involved in the study, you must enter the contact details using the Search User fields
- Begin typing the name in the Search User field; press Enter or Tab to confirm your selection and auto-populate the contact details
- Click on the green Add Another button to open another Search User area to add more directly involved U of G/UofGH team members/collaborators if needed
-
Now list any U of G/UofGH study team members/collaborators who are peripherally involved in the study

- Upload the TCPS CORE certificates for all direclty of peripherally invovled U of G/UofGH study team members/collaborators who are students and post-doctoral fellows (optional but highly recommended for all other study team members/collaborators)
Team Members/Collaborators Not Formally Affiliated with U of G/UofGH
These steps are exactly the same as the previous panel with the exception that individuals listed here will not have an affiliation with the U of G/UofGH and you do not need to upload their TCPS CORE training certificate.
Reminder: If you are not the PI, and are not affiliated with U of G/UofGH, you must also add yourself as an ‘additional’ study team member in this section.
Assigning Access (Roles)
At the bottom of the Personnel page, you will be prompted to assign an EthOS role to any study team members/collaborators who need access to this application.
Roles can only be assigned to study team members/collaborators with active EthOS accounts.
Three roles with the following pre-configured permissions are available:
- Principal Investigator: full edit access and the only role with signing authority; this role must be assigned (if you are not the PI creating this application) to ensure that the PI receives all the correct system and email notifications throughout the study
- Co-Investigator (Edit): mirrors the PI level of access with the exception of signing authority; this is an optional role for anyone else who may need to edit this application
- Read Only: an optional role for other study team members/collaborators who just need read-only access
For more detailed description of these permissions, see the Sharing Forms (Assigning Roles) materials and/or the Sharing Forms (Assigning Roles) training video.
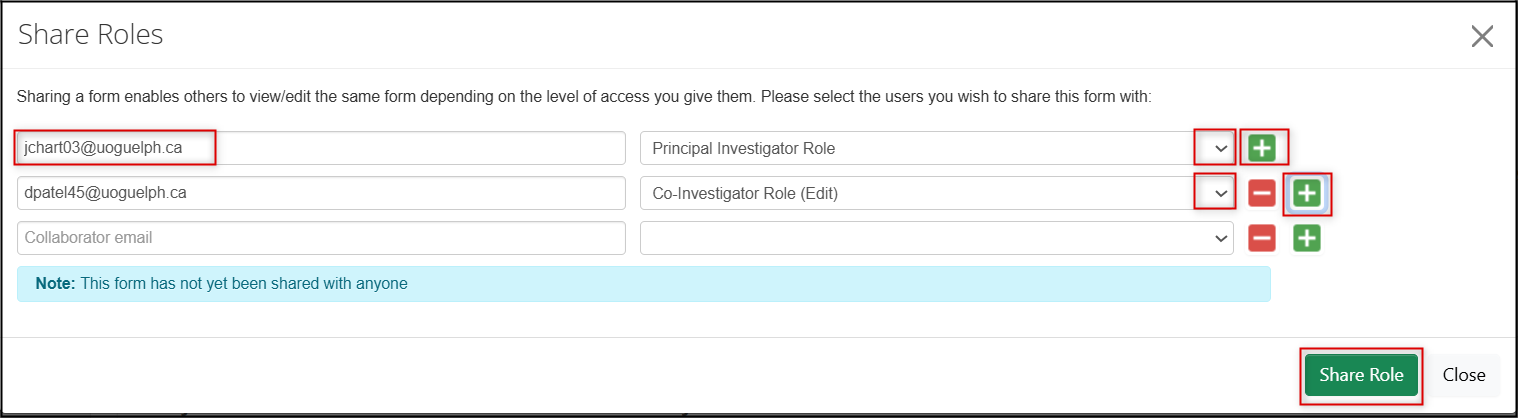
Steps to Assign a Role
Once you have determined who on the study team needs a role:
-
Click on the Roles button in the actions ribbon

-
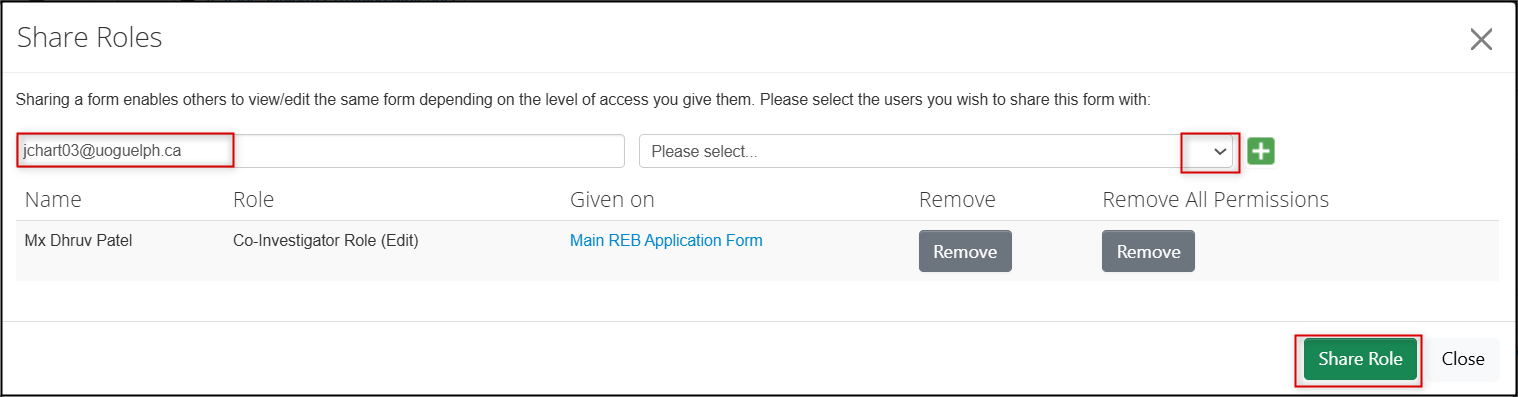
In the Share Roles pop-up window, enter the names of the study team member/collaborators (start with the PI, if you are not the PI creating this application) and choose the appropriate role from the drop-down menu
- Click on the green + button to add more study team members/collaborators
-
Click on the green Share Role button to assign the roles to the study team members/collaborators you have listed in the pop-up window
-
The study team member/collaborator receives an email letting them know that you have assigned a role, including a link to the application form
-
This project will also appear in the study team member/collaborator's Project List and Shared tile in their Work Area
-
This project will also appear in the study team member/collaborator's Project List and Shared tile in their Work Area
Changing Personnel Page Entries and/or Roles
Remember that listing names on the Personnel page and managing application access are two distinct steps in EthOS. If you add a name to the Personnel page, you may also need to ensure they have an EthOS role. Or, if you remove an EthOS role you may also need to remove that person’s name from the Personnel page. Making a change to one aspect does not automatically flow through to the other.
Please follow these guidelines and suggested process based on the nature of the change you need to make:
Changing the List of Study Team Members/Collaborators
- If the application has not been submitted, changes can be made to the individuals listed on the Personnel page
- If the application has been approved, changes can only be made by submitting an Amendment
- If the application has been submitted but is not yet approved, contact the Ethics Office to discuss the best approach (it will depend on your unique application and where it is in the approval cycle) – tip, use the Correspondence option in the form!
Steps to Update the Personnel Page
-
To remove someone who has been listed with the Search User fields, click on the red Remove button below their contact details
• Note: this will remove the entire Search User ‘block’ (First Name, Surname, Department, Email) -
To add someone using the Search User fields (used for anyone directly involved), click on the green Add Another button and enter their details
-
To change the names of any peripherally involved study team members/collaborators, update the entries in either Question 2.7 or Question 2.12

- Remember to detach/upload any associated CORE training certificates if applicable
- Ensure that you make equivalent changes to the EthOS roles if applicable (see steps below)
Steps to Remove, Add or Reassign EthOS roles
EthOS roles can be removed or added at any time as this is a separate and distinct step from identifying members of the study team.
-
Click on the Roles button at the top to open the Share Roles pop-up window

-
To assign a role to a new researcher, enter their name, choose the role from the drop-down menu, and click on the green Share Role button
-
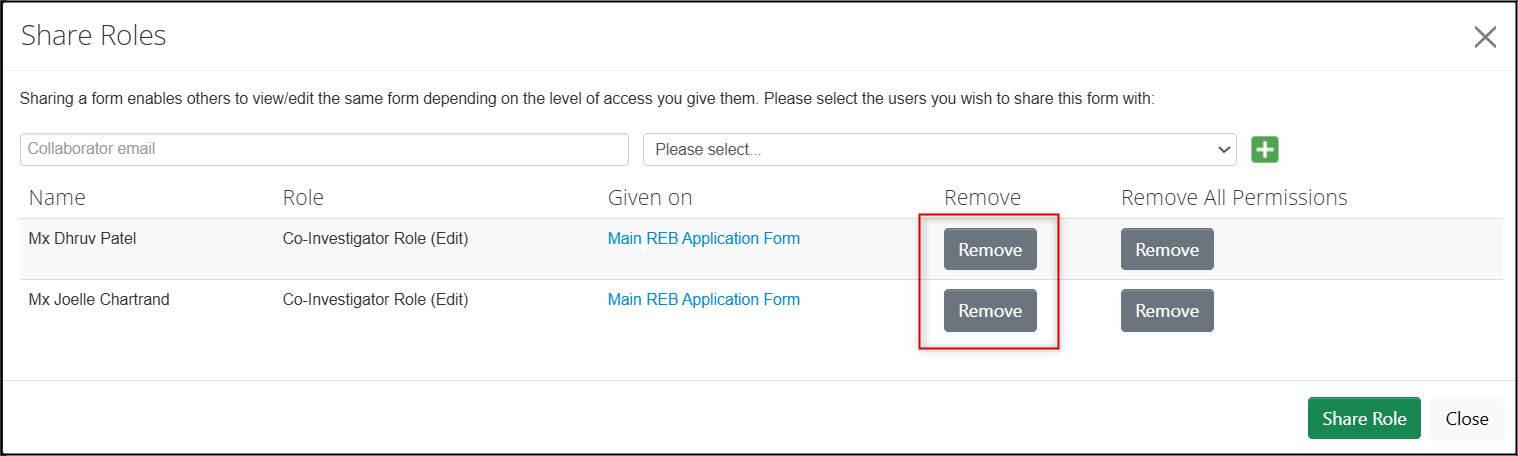
To remove previously assigned permissions, click on the grey Remove permissions button
- Note: If the user is only listed once, either of the Remove buttons will have the same effect. If the user is listed twice, you can remove all the entries using Remove All Permissions.
- To change someone’s role, first remove the old role (see Step 3) and then add the new role (see Step 2).
- Remember to reconcile any changes in roles with the Personnel page, if needed (see previous section)
Uploading Documents
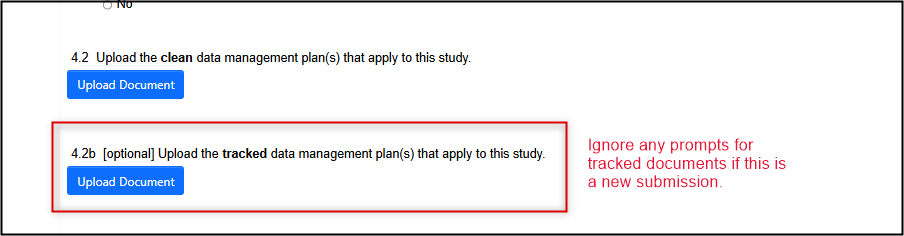
As you complete the application you will be periodically prompted to upload documents. Some document uploads are optional and some are mandatory. Documents are uploaded from your local drive and must be uploaded one at a time.
- Note: For new applications, only ‘clean’ versions of documents will be required. If you see an optional prompt for a ‘tracked’ version you can ignore this. However, later, if you are responding to an REB modification request or making an amendment, ‘tracked’ versions of any changed documents will be required.
Documents are uploaded with the question to which they relate. Do not upload the same document for multiple questions.
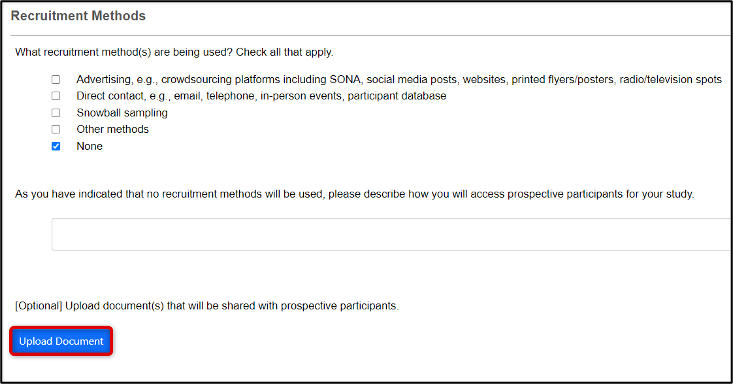
-
Click on the Upload Document button when prompted to upload documents
-
Browse for the document, enter the Version Date and Number, and click on the Upload button
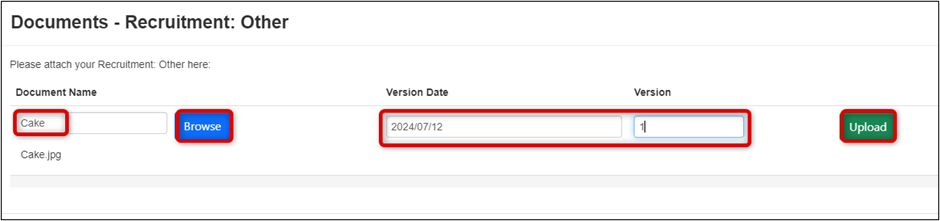
- To upload multiple documents, repeat Steps 1 and 2.
-
If you have uploaded an incorrect document (or later, if you are modifying/amending an application and are uploading a newer version of the same document), first delete the previous one and then re-upload the correct document. For any question that has a document upload prompt, only one version (the latest) is needed

Note: where you see a prompt to upload 'tracked' documents, this only applies for modifications or amendments, and can be ignored for initial (new) submissions.
Finding Uploaded Documents
Access uploaded documents via the Documents button or under the Documents tab. Documents can be searched for (on title only), viewed or downloaded individually or in bulk at any time.
Tip! The View Selected option allows you to select single or multiple documents and view them in a consolidated online document that you can page through.
![]()

Collaborator Comments
At any point in the form, the Comments icon supports internal discussions between collaborators while you prepare your application. These comments are not visible to reviewers.
As you make comments, the Overview Pane (on the right) displays the total number of comments in the overall form. The Comment icon (on the page title line) displays the number of comments for a specific question in the form.

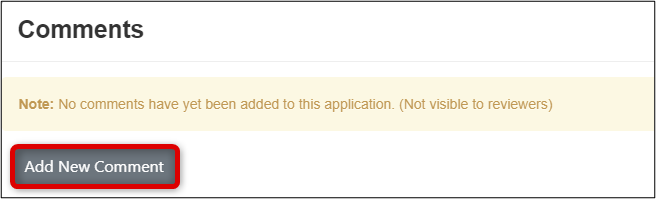
Adding a New Comment
-
Click on the Comment icon (the 'speech bubble' to the far right of the question area) and click on the Add New Comment button
-
Enter the comment and click on the Save button
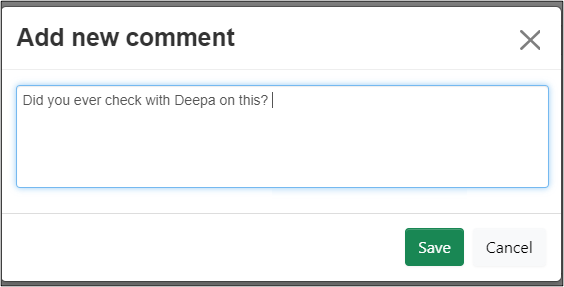
The Comment icon and Comments tile update with the new number of comments.
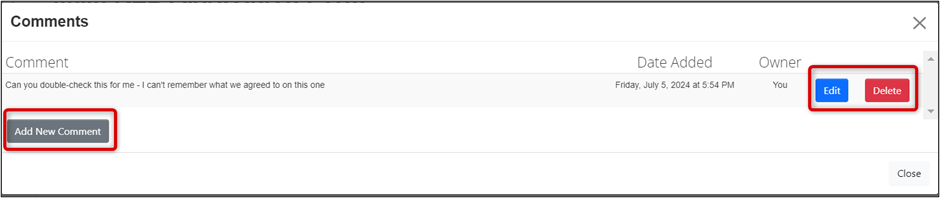
Reading, Editing, Deleting, and Adding More Comments
- Click on the Comment icon (the 'speech bubble') or the Comments button to see the comment list and history
-
Edit or Delete the comments (if you are the comment owner), or Add New Comments
Built-In Correspondence
As you complete your application, use the Correspondence feature to communicate directly with the Research Ethics office. This will conveniently keep your exchanged messages within the project file for ease of ongoing access and reference. Any collaborators on the form will be able to see and initiate correspondence which means your whole team has full visibility to any project-related messages with the REB office.
To initiate correspondence with the Research Ethics Office:
-
Click on the Correspondence button at the top of the page to open the Correspond pop-up window; enter your message and then click on the Send button

-
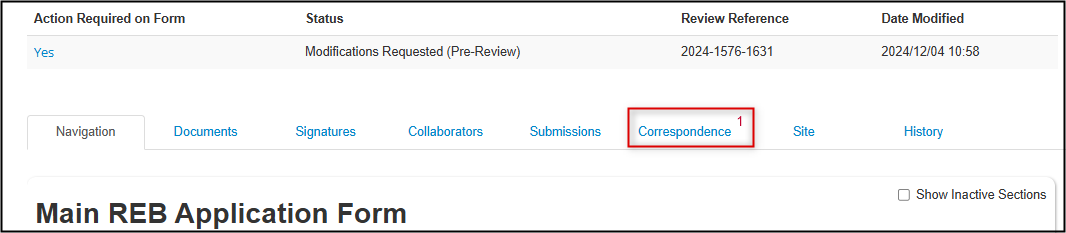
Or, click on the Correspondence tab in the Main Application Form and click on the New Correspondence button, write your message and click on the green Send button

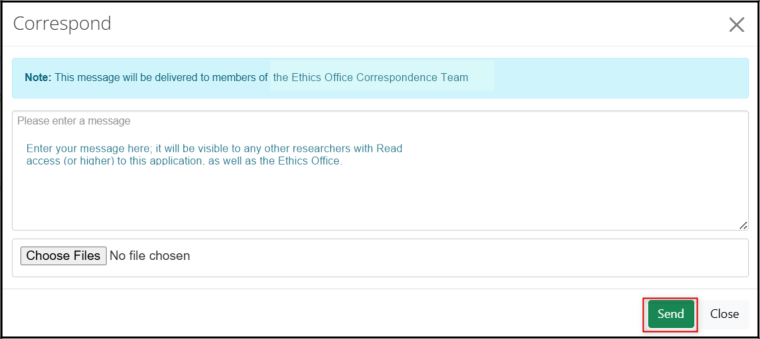
A green banner confirms that your message has been sent. Return to the Correspondence tab at any time to access your sent messages.
-
Note: Where there is an unread message, it appears in the Correspondence tab with a red number.
Completeness Check
A Completeness Check runs automatically prior to signing or requesting a signature but can also be conducted at any time during your application. This feature allows you to quickly identify and access any missing sections or components of your application.
-
From anywhere in your application, click on the Completeness Check button at the top of the page

EthOS identifies areas within the form that still require information; links within the Completeness Check take you directly to the question(s) requiring information.
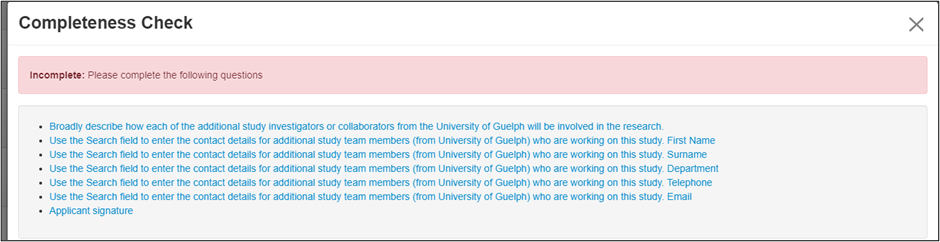
- Note: If there are multiple missing items, run the Completeness Check after making each of your updates to continue linking to other incomplete sections.
Signatures and Submitting Applications
When you are ready to submit your application, the Principal Investigator (PI) must sign the completed application. If you are the form owner and the PI, you can sign the form. If you are not the PI, you must request the PI’s signature. As soon as the form is signed, it is automatically submitted to the Research Ethics office.
Note: Signatures are completed or requested from the Signatures section in the form (they will eventually appear in, but cannot be triggered from, the Signatures tab).
Signing & Submitting as the Form Owner and Principal Investigator
When you are ready to sign the application, first ensure that you are in the Signatures page of the application form. If you are not, return to the Navigation Overview section and click on the Signatures page.
- Note: EthOS will automatically run a Completeness Check when you attempt to sign an application; complete any missing information first

-
From the Signatures page, click on the blue Sign button; enter your UofG/ U of GH credentials if prompted and then click on the green Sign button

Signing automatically submits your application and EthOS displays the Form Queued for Submission page.
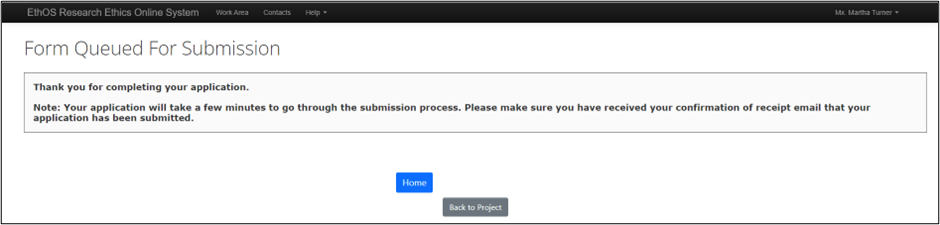
The form owner receives a confirmation email.
- Note: Ensure that you receive the confirmation email to be certain that your application was submitted. If you have not received the email after 30 minutes send an email to RAIMSsupport@uoguelph.ca
Requesting Signature from the Principal Investigator
Request the signature only after confirming that the Principal Investigator (PI) has thoroughly reviewed the content and is unlikely to suggest further changes. Assigning the PI role earlier in the application process grants them access for preliminary review, allowing you to incorporate their feedback before initiating the signature request. Should the PI have additional comments, they will need to decline the signature request.
-
Reminder: signatures can only be initiated from the Signatures page of the application
-
On the signatures page, click on the Request Signature button, enter the PI’s email address and any message in the pop-up window, and click on the Request button

- An email notification is sent to the PI with a link to the application requiring the signature.
- The PI can then review the Signature Declaration and sign the form.
-
Once the PI signs the application, it is automatically submitted and the form owner receives an email confirmation
Note: if you are a PI, to sign an application follow the steps in the Managing your Projects - Principal Investigator Signature materials
Reviewing Signature History
In the form, the Signatures tab updates to show that the PI has signed the application. The Submissions tab and the Overview pane show a status of Submitted by Applicant.

Note: EthOS processes the automatic submissions in batch cycles every ten minutes; please allow up to ten minutes for your status to change from Submission in Progress to Submitted by Applicant and to receive the confirmation email.
View Applications as PDF
You may wish to view a completed form as one document outside of EthOS. There are various use cases for this feature:
- EthOS does not currently support full-text searches within applications; however, if you generate a PDF file, a full-text search can be completed outside of EthOS
-
Scrolling through the form in a PDF view provides a holistic view of the application’s contents and which sections have been generated for your application
- Note: contents of any uploaded documents will not appear in the PDF
- The PDF file can be printed for any hard-copy requirements
PDF generation can be triggered from various places within the form, but the most common option is from the Actions Pane.
-
Click on the View as PDF button to generate a downloadable Application.pdf file

-
In the View as PDF pop-up window, click on the View button
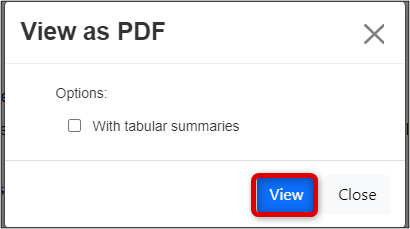
Note: you do not need to select the tabular summaries checkbox
The PDF generates inside one of your browser window tabs and may take a minute to load fully. Download the PDF file from your browser window and open it from your computer’s download folder.